We asked Josh Parks, Senior Compositor at MPC Advertising, what TCL and Python scripts he uses to speed up his Nuke efficiency. Below, Josh runs through the top five scripts that help him to focus on creating art, rather than tweaking settings.
The more time a compositor can invest in their art, and the less in adjusting settings, the better the final image will be. Setting up a workflow that enables fast and focused work on imagery should therefore be every competitor’s goal. An efficient workspace, designed around ease of use, can sometimes make the difference between a great image and one that fails to hit the mark.
TCL and Python scripts are a great way of speeding up efficiency in Nuke workflows. We asked Nuke expert Josh Parks to cover some of the quick-and-easy Nuke scripts he uses to focus on imagery rather than settings.
Want to learn more from Josh? Head to the end of the blog for more Nuke efficiency training resources.
Did you know?
ftrack Studio integrates with Nuke to allow for easy tracking of tasks from directly within in Nuke.
1. Quickly set all Switch nodes to the same setting
Save time by creating a node that adjusts the value for all Switch nodes using the same setting.
Let’s say you get a note from a client requesting less motion blur. If this needs to happen in comp, you’ll need to lower your nodes’ shutter speed. It will take a long time to manually reduce shutter speed across all ScanlineRender nodes and VectorBlur nodes. Also, there is no guarantee that the client won’t change their mind again in the future.
To circumvent the issue, you can create a node to set the value for all nodes with a shutter speed Knob. You can achieve this manually by expression linking your values. I’ve seen people do this, but there is a quicker way!
We can use Python to run through your script and set a pre-defined expression on specific types of nodes.
Here’s the Python script:
for node in nuke.selectedNodes(‘Switch’) :
node[‘which’].setExpression(‘parent.Grade22.white’)
Let’s break it down:
nuke.selectedNodes(‘Switch’) tells Nuke to run the following Python script on all selected nodes.
(‘Switch’) tells Nuke to filter out anything that isn’t a switch and run the following Python code on the remaining switch nodes only.
The for at the start is a for loop. This loop repeats the subsequent code for the Switch nodes you have selected. If you have selected 20 nodes and four of them are Switch nodes, the Python code beneath will run four times, and once on every Switch node.
setExpression pastes the expression (‘parent.Grade22.white’).
2. Faster workflows for swapping a single Camera node
Here’s something I’ve found useful over the years. I bring in a Camera node for my shot camera, then connect this one Camera node into all my nodes that need a Camera input. The advantage of this is that Nuke only has to read the Camera in once.
For example, let’s say the shot’s Camera changes. Usually, you would need to sift through the script and replace every Camera node with the new, updated Camera. That takes too long, you end up with messy Nuke pipes all over your script, and it’s tricky for new artists who pick up the script to work out what’s happening.
You can achieve the same result by swapping just one Camera node.
Sometimes, I like to connect a Dot node to all my ScanlineRender camera inputs, then connect this to my shot Camera. I then hide my input on the Dot node, which conceals the line connecting to it. The problem here is that in doing so, you once again cause confusion when passing scripts between artists. It looks like you have Dot node with nothing connected to it.
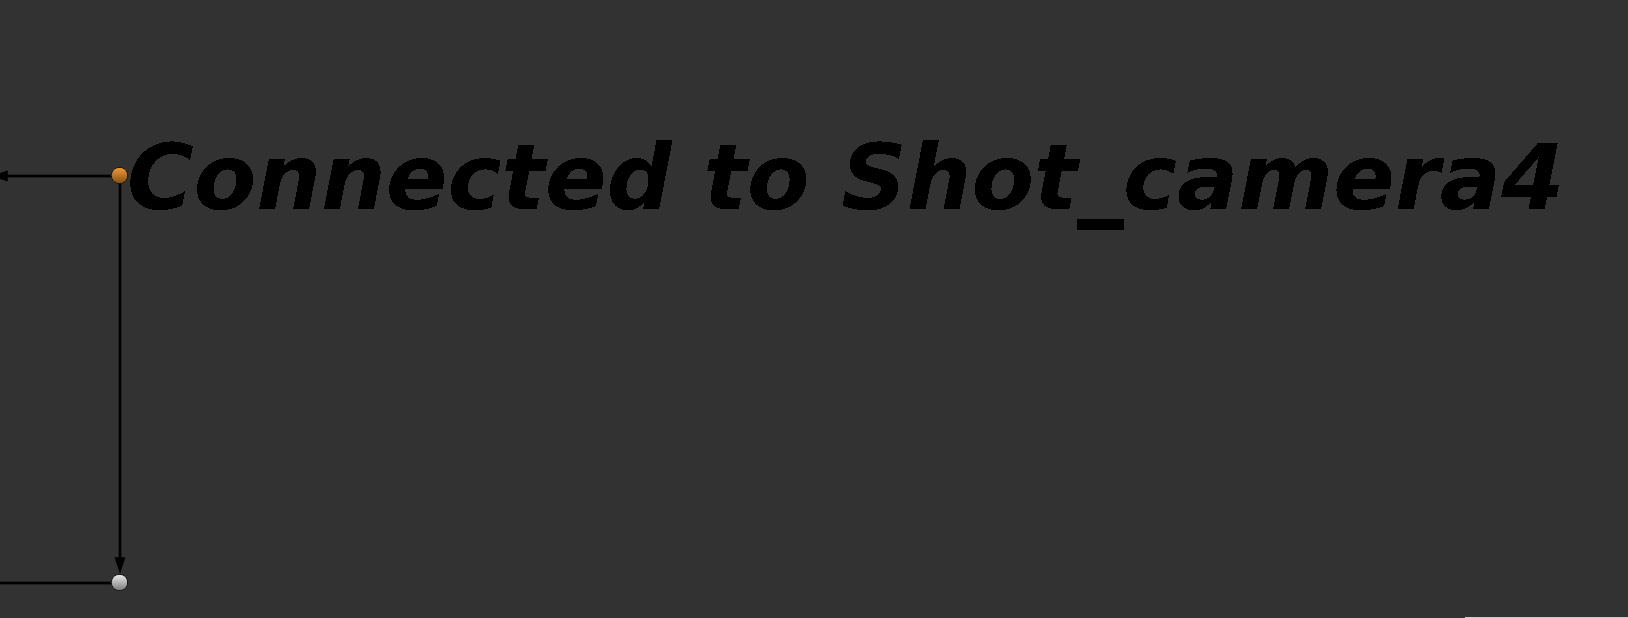
You can overcome this confusion by using a label and noting the camera the Dot node connects to. It is much faster, however, to use a simple TCL script that will automatically display the connected node. This approach will open up faster workflows within Nuke.
Just write the following TCL script into the label Knob of your node:
[value [topnode].file]
3 – Utilize the $gui expression

The $gui expression is a piece of TCL you can utilize if you’re rendering without the GUI (graphic user interface) open. For example, if you’re rendering on a render farm. When the GUI is open, it returns true or 1. When the GUI isn’t open, it returns false or 0. You can utilize this process in multiple ways.
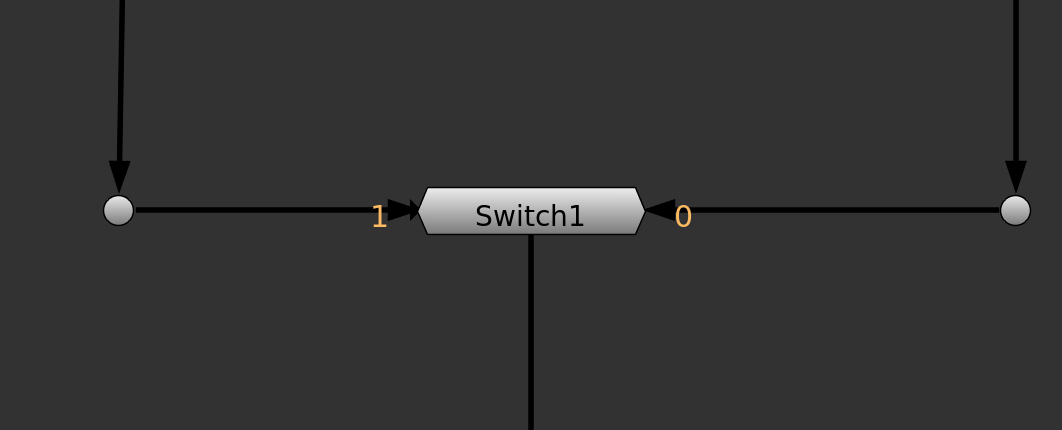
The first way to utilize the $gui expression is with Switch nodes. Using the $gui expression on the value of a Switch allows you to view one input when working locally, and another when you push your render to the farm. When you do so, the Switch node will swap to the other input. For instance, you can have two ScanlineRender nodes, one with higher motionblur samples from the farm, and one with low samples for when you work locally and want low local caching times.
The second way to utilize the $gui expression is to turn a node on and off by adding an expression to your Disable node Knob. When true (GUI open), the expression will tick the disable node knob. When false, the expression will not disable the node. This process allows you to turn off heavy nodes when working locally, then enable them when working on the farm.
There are some issues with using $gui expressions. For example, if someone opens the Nuke script, it won’t match with the output, as specific nodes will only turn on when rendering. With this in mind, it’s worth clearly labelling where nodes use a $gui expression. I make mine bright pink and whack in a label where I’m using the expression.
4. $gui? 1:16
We’re not finished with $gui! There’s a bit more to this expression yet.
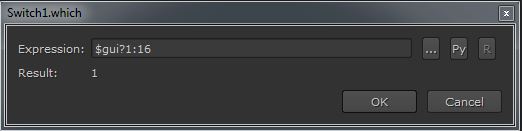
Beyond disabling and enabling a node, you can use $gui to up your sample settings when pushing a shot to the farm. You can do so with the expression $gui? 1:16. This piece of TCL asks whether the GUI is open. If the GUI is open, it uses the first value 1 if true or the GUI is open, and returns 16 if the GUI is closed.
The $gui 1:16 expression is beneficial if you want to work with lower render setting in your ScanlineRender node, then whack up sampling when you send it to the render farm. The main benefit here is that the expression keeps your Nuke script running fast and smooth, and helps to produce excellent results.
5. Is error? [value error]
Have you ever been unable to view your Nuke script due to an errored out node? This TCL will help.
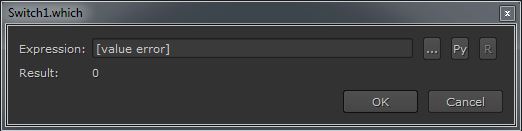
If you encounter this error, add an expression in a Switch node [value error]. This expression will be set to 0 when there is no error connected to the Switch node. The expression will flick to the 1 input when it recognizes an error upstream.
This process is incredibly handy if your CG renders are on the farm, for example, and they detect an error when reading on some frames. Using this expression will stop your viewer from erroring, so you can continue working and focus on your art!
More Nuke training resources
Would you like to learn more about increasing your efficiency with Nuke with Josh Parks? Learn more via the links below!

Try the ftrack Studio plugin for Nuke
Start a free trial of ftrack Studio to find out how it natively integrates with Nuke, enabling side-by-side compositing and project management.
More from the blog